There's something deeply satisfying about rendering a block of suet into a clean, white fat and turning it into something you put on your skin. If you've been watching tallow skincare blow up on TikTok and Reddit and thought "I could just make this myself" -- you're right. You can. And this post is going to show you exactly how, step by step, with a simple recipe that works.
But we're also going to be honest about the parts most DIY tutorials skip: shelf life without preservatives, the texture problem, the smell, and what happens when you try to add water-based ingredients like aloe vera to a fat-based formula without emulsification science. Because those details matter, and you deserve the full picture before you commit your Saturday afternoon to rendering beef fat in your kitchen.
What you'll need
This recipe is intentionally simple. Three ingredients, basic kitchen equipment, no specialized supplies. Here's your list:
Ingredients
- 1 cup rendered beef tallow -- grass-fed if possible (more on why below). You can render it yourself from suet or buy pre-rendered tallow from a local farm, butcher shop, or online.
- 2 tablespoons coconut oil -- unrefined, cold-pressed. This softens the tallow and improves spreadability.
- 10-15 drops essential oil (optional) -- lavender and frankincense are popular choices. This is purely for scent. Skip it entirely if you have sensitive or reactive skin.
Equipment
- Double boiler or a heat-safe glass bowl set over a pot of simmering water
- Hand mixer or stand mixer with a whisk attachment
- Glass jar with a lid (4-8 oz mason jars work well)
- Spatula
- Thermometer (optional, but helpful)
If you're starting from raw suet rather than pre-rendered tallow, you'll also need a fine mesh strainer or cheesecloth, a large pot, and about 3-4 hours of patience. The rendering process is its own project -- we'll cover it briefly, but the recipe below assumes you're starting with clean, rendered tallow.
How to render tallow from scratch (the quick version)
If you bought pre-rendered tallow, skip to the recipe. If you're starting from raw suet -- the hard white fat around the kidneys and loins of a cow -- here's the process:
- Chop or grind the suet into small pieces. Smaller pieces render faster and more evenly. Some people run it through a meat grinder; a sharp knife and cutting board work fine.
- Add to a large pot with about a quarter cup of water (the water prevents scorching at the start and evaporates during rendering).
- Heat on the lowest setting possible. You're melting fat, not frying it. Keep the temperature below 250F. Stir occasionally. This takes 2-4 hours depending on the amount.
- Strain through cheesecloth or a fine mesh strainer into a clean glass jar. The liquid should be golden and clear. Let it cool at room temperature, then refrigerate. It'll solidify into a clean white block.
- For skincare-grade tallow, double render. Melt the solidified tallow again, add a small amount of water, simmer for 30 minutes, strain again. This removes residual proteins and impurities that can cause odor and reduce shelf life.
The kitchen will smell like beef. That's normal. Open a window. The finished product should have a mild, neutral scent -- if it smells strongly of beef after solidifying, it wasn't rendered low enough or long enough.
The recipe: 3-ingredient whipped tallow moisturizer
This produces a whipped, balm-like moisturizer with a texture similar to thick body butter. It won't be a lotion -- getting to lotion consistency requires emulsifiers and a water phase, which we'll talk about later. But as a balm, it works well for hands, elbows, feet, and dry patches.
- Melt the tallow. Place 1 cup of rendered tallow in a double boiler or heat-safe bowl over simmering water. Melt it completely -- this takes about 5 minutes. Don't overheat; you just need it liquid.
- Add the coconut oil. Once the tallow is melted, add 2 tablespoons of coconut oil and stir until fully combined. The coconut oil lowers the melting point slightly, which keeps the finished product softer and easier to scoop.
- Cool the mixture. Remove from heat and let it cool at room temperature until it starts to turn opaque around the edges but is still soft in the center. This usually takes 30-45 minutes. You can speed it up by placing the bowl in the refrigerator for 15-20 minutes, but check it frequently -- you want it partially solidified, not rock hard.
- Whip it. Using a hand mixer or stand mixer, whip the partially solidified mixture on medium-high speed for 3-5 minutes. It will lighten in color and increase in volume, similar to whipping butter. This is where the texture goes from dense and waxy to light and spreadable.
- Add essential oils (optional). Drop in 10-15 drops of your chosen essential oil during the last 30 seconds of whipping. Lavender and frankincense are popular in the tallow community. Tea tree has antimicrobial properties but can irritate sensitive skin.
- Transfer to jars. Scoop the whipped tallow into clean glass jars. Press down gently to remove air pockets. Cap tightly.
That's it. You now have a whipped tallow moisturizer that you made in your own kitchen. Use it within 2-3 months if stored at room temperature, or up to 6 months if refrigerated.
Pro tips that actually make a difference
Double-render for skincare. Single-rendered tallow works fine for cooking but can carry residual proteins that cause a beefy smell and shorten shelf life. Double-rendering (melting, adding water, simmering, straining again) removes those impurities and produces a cleaner, more neutral base. If you're putting this on your face, double-render.
Grass-fed matters here. Grass-fed beef tallow has a different fatty acid profile than grain-fed. The ratio of omega-6 to omega-3 fatty acids is significantly lower in grass-fed tallow -- some analyses show ratios as low as 2:1, compared to 10:1 or higher in grain-fed. A 2014 study in Lipids in Health and Disease found that conjugated linoleic acid (CLA), which appears in meaningful concentrations only in grass-fed animal fats, demonstrated anti-inflammatory effects in dermal tissue. Grass-fed tallow also contains higher levels of vitamins A and E. For a deeper look at why sourcing changes the formula, the post on grass-fed beef tallow moisturizer covers the science in detail.
Storage and shelf life. Without preservatives, your whipped tallow is a living product. It will oxidize over time. Keep it in a dark glass jar away from direct sunlight and heat. Always use clean, dry hands or a small spatula -- introducing water or bacteria into the jar accelerates spoilage. If it develops an off smell or changes color significantly, discard it and make a new batch.
Temperature sensitivity. Tallow melts at roughly 95-104F (35-40C). In a warm bathroom or during summer, your whipped balm may soften or partially melt. This doesn't ruin it -- just re-whip after it cools. But it's something to plan for if you live in a warm climate.
The honest limitations of homemade tallow moisturizer
DIY tallow moisturizer works. It genuinely does. The fatty acids in grass-fed tallow -- oleic acid, palmitic acid, stearic acid -- closely mirror the lipids your skin produces naturally, and a 2019 review in Dermato-Endocrinology confirmed that structural similarity between topical lipids and endogenous skin lipids is a key predictor of barrier integration. Your homemade balm delivers those fatty acids. That's real.
But there are trade-offs that come with the DIY approach, and pretending they don't exist would be doing you a disservice.
No preservatives means limited shelf life. Commercial skincare products undergo preservative efficacy testing (PET) to ensure they resist microbial growth for 12+ months. Your homemade tallow balm has no preservative system. In warm or humid conditions, bacteria and mold can develop within weeks, sometimes before you can see or smell it. The general consensus in the DIY skincare community is 2-3 months at room temperature, but that assumes clean handling every time you open the jar. For more on why tallow works on skin in the first place, the post on beef tallow for skin breaks down the fatty acid science.
Texture is balm, not lotion. A whipped tallow balm is rich and effective, but it's not a lotion. Lotion consistency requires an oil-in-water emulsion -- combining a fat phase with a water phase using emulsifiers, then stabilizing the result so it doesn't separate. That's cosmetic chemistry, not kitchen improvisation. If you prefer a lighter, lotion-like texture that absorbs quickly without residue, DIY tallow will frustrate you.
Batch variation is real. Every batch of suet is different. Different cows, different diets, different rendering temperatures -- all affect the final texture, color, and performance. Commercial formulations standardize their tallow through testing and quality control. Your kitchen batches will vary, sometimes noticeably.
The smell. Even well-rendered, double-filtered tallow has a faint fatty scent that some people notice. Essential oils can mask it, but they don't eliminate it. If you're sensitive to scent or plan to wear your moisturizer under perfume or cologne, this is worth knowing upfront.
You can't easily add aloe vera. This is the one that trips up a lot of DIY makers. Aloe vera gel is water-based. Tallow is fat-based. Oil and water don't mix without an emulsifier. If you stir aloe gel into melted tallow, it will separate -- and the water phase creates an environment where bacteria thrive, dramatically cutting your shelf life and potentially creating a product that's unsafe to use on skin. Proper aloe-tallow integration requires emulsification equipment and preservative systems that go beyond a home kitchen setup.
Why some people graduate to formulated products
Making your own tallow moisturizer is a great way to understand what tallow does for skin and whether your skin responds well to it. A lot of people start there. Some stay there permanently -- they enjoy the process, they have a reliable suet source, and a simple balm is exactly what they need.
Others eventually want things that DIY can't deliver: a lighter lotion texture, proper preservation for longer shelf life, consistent results batch after batch, and complementary ingredients like aloe vera that require professional formulation to integrate safely.
That's not a knock on DIY. It's just the reality of what different approaches can do. A home kitchen and a formulation lab solve different problems. If you've tried making your own tallow moisturizer and loved what it did for your skin but wished the texture were lighter, the shelf life were longer, or you could get aloe's hydration benefits in the same product -- that's the gap that professionally formulated tallow products fill.
The science behind combining tallow with aloe vera specifically is worth understanding. Aloe's primary active compound, acemannan, promotes skin hydration and supports hyaluronan production -- a naturally occurring humectant in your skin. A 2008 study in Evidence-Based Complementary and Alternative Medicine found that acemannan increased hyaluronan synthesis in dermal tissue, providing surface-level hydration that complements tallow's deeper lipid barrier work. But getting those two ingredients into a stable, shelf-safe formula requires emulsification that maintains the integrity of both. The post on aloe vera body lotion goes deeper on why most aloe formulas underdeliver.

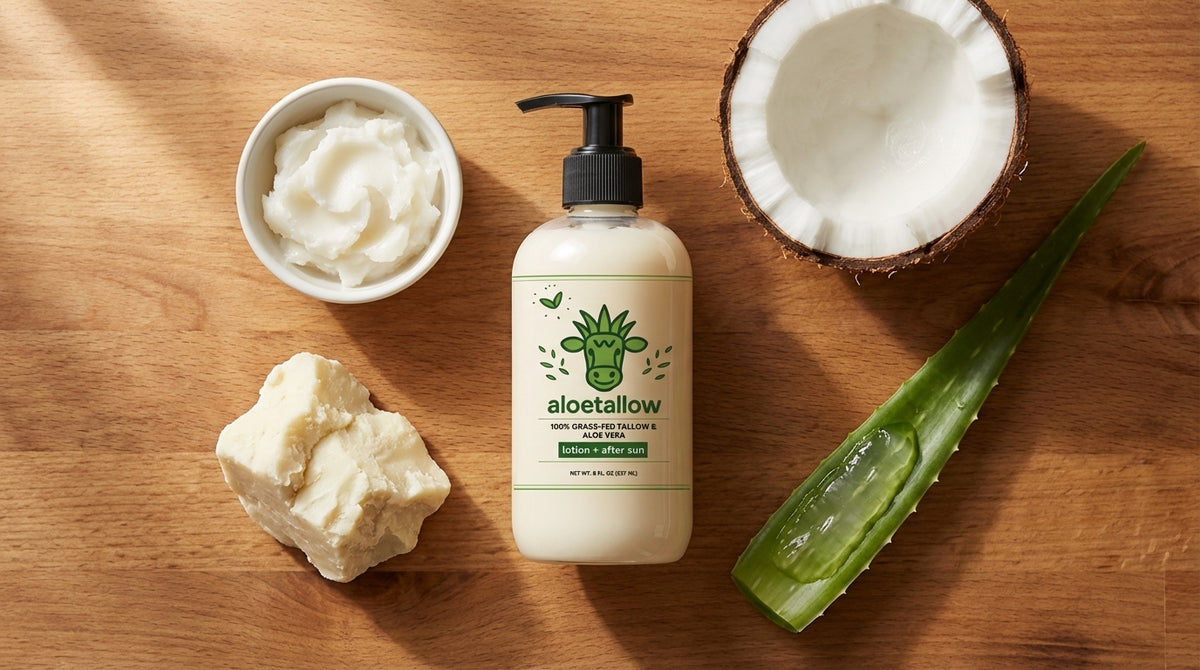
8 ingredients. Grass-fed tallow + aloe vera. Nothing you can't pronounce.
Frequently asked questions
How long does homemade tallow moisturizer last?
At room temperature with clean handling, expect 2-3 months. Refrigerated, up to 6 months. Without a preservative system, there's no way to guarantee microbial safety beyond that. If it develops an unusual smell, changes color, or shows any signs of mold, discard it immediately. Commercial tallow products with proper preservation typically last 12+ months.
Can I add aloe vera to my DIY tallow recipe?
Not safely without an emulsifier and preservative system. Aloe vera gel is water-based; tallow is fat-based. Mixing them without proper emulsification creates an unstable product where the water phase separates and becomes a breeding ground for bacteria. If you want both ingredients in one product, you need either cosmetic chemistry knowledge (emulsifiers like BTMS-50 or Polawax, plus a broad-spectrum preservative) or a commercially formulated product that's already solved that problem. AloeTallow is one example -- it combines grass-fed tallow and aloe vera in a stable, preserved formula with 8 total ingredients.
What about bacteria in homemade tallow products?
Anhydrous products (no water content) are inherently more resistant to microbial growth than products containing water. Your basic tallow-coconut oil balm is anhydrous, which gives it a natural advantage. The risk increases if you introduce any water -- wet hands dipping into the jar, storing it in a humid bathroom, or adding water-based ingredients like aloe or hydrosols. Keep your utensils clean, your hands dry, and consider using a small spatula instead of your fingers to scoop product out of the jar.
Does homemade tallow moisturizer clog pores?
Tallow has a comedogenicity rating of 2-3 on a 0-5 scale -- moderate, not high. Most people use it on their face without issues, particularly if they apply a thin layer to damp skin. But individual skin chemistry varies. If you're acne-prone, test your homemade balm on a small area (forearm or jawline) for a week before going full-face. The post on whether tallow clogs pores covers the science in more detail.
Is DIY tallow cheaper than buying a tallow lotion?
Per ounce, yes -- especially if you source suet directly from a local butcher or farm. A pound of grass-fed suet typically costs $3-8 and yields roughly 12-14 ounces of rendered tallow. Add in coconut oil and essential oils, and your cost per jar is well under $5. The trade-off is your time (3-5 hours for the full render-and-whip process), the batch-to-batch inconsistency, and the shorter shelf life. Whether that trade-off works for you depends on how much you value the process itself.
The bottom line
Making your own beef tallow moisturizer is a legitimate, effective way to get grass-fed tallow's fatty acids onto your skin. The recipe above works. Thousands of people in the homesteading and clean beauty communities use some version of it every day, and their skin is better for it.
The question isn't whether DIY works -- it does. The question is what you need from your skincare and how much kitchen time you're willing to trade for it. If you love the process, have a good suet source, and are happy with a rich balm texture, keep making it. If you find yourself wanting lighter texture, longer shelf life, and ingredients like aloe vera that don't play well with kitchen formulation, that's when a professionally formulated product earns its place on your shelf.
Either way, your skin is getting real fatty acids instead of petroleum derivatives and synthetic fillers. That's the part that matters most.